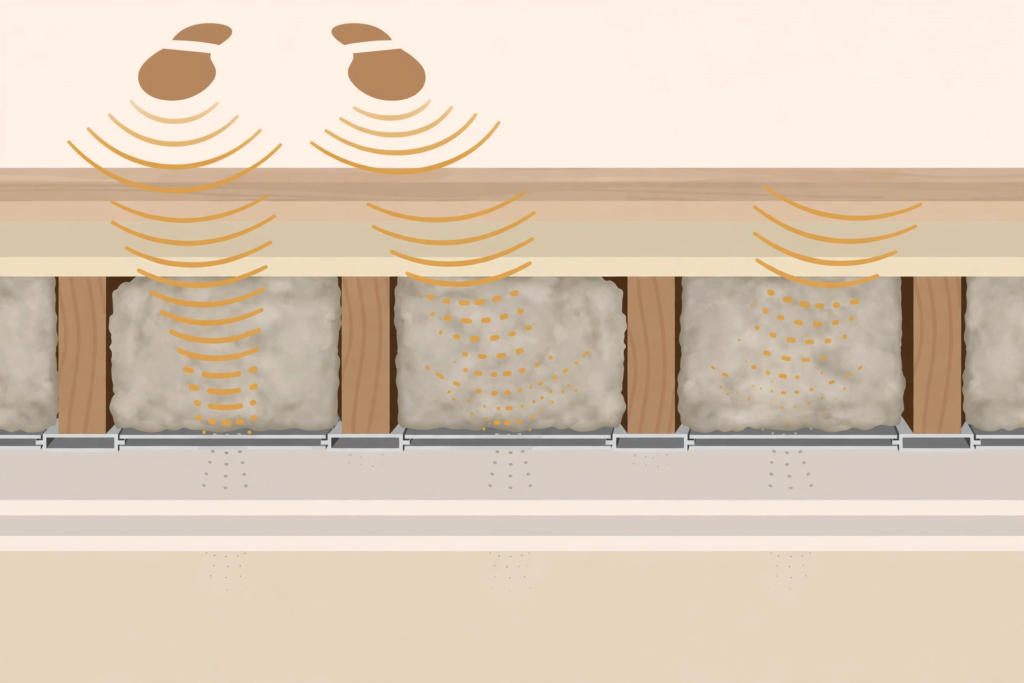
If you can hear every footstep, every TV scene, and every late-night conversation from the floor above, your basement ceiling is the problem. Sound travels down through the floor joists and the thin drywall (or no drywall at all) separating your basement from the rest of the house. The good news: this is one of the most fixable noise problems in a home, and you can do most of it yourself.
This guide walks through every method that actually works for a basement ceiling — in the order you should do them, with honest cost estimates and no product hype. Read the whole thing, or jump to the method that matches your budget.
Why Sound Travels Through Basement Ceilings So Easily
Sound reaches your basement ceiling two ways:
- Airborne noise — voices, TVs, music. These travel through the air and through gaps in the ceiling.
- Impact noise — footsteps, dropped objects, kids running. These vibrate the floor above, and the joists carry that vibration straight down.
Most basements are bad at blocking both. Exposed joists or a single layer of old drywall offers almost no resistance. A proper fix usually combines two or more methods, because each one targets a different weakness. That is why this guide builds layer by layer: seal the gaps first, then add mass, then decouple the structure.
Before You Start: What Does NOT Work
Save your money. These popular fixes are poor soundproofing:
- Acoustic foam panels. The wedge-shaped foam you see in recording studios absorbs echo inside a room. It does almost nothing to stop sound from traveling through a ceiling. Foam on a basement ceiling will make the basement sound a little less echoey and will not quiet the footsteps above.
- Egg-crate mattress pads or moving blankets. Same problem — absorption, not blocking. They shave a decibel or two at most.
- Just adding another layer of regular drywall with screws. This adds some mass, which helps, but driving screws straight into the joists keeps a hard path for vibration. Without damping or decoupling, you get far less improvement than the effort deserves.
Everything below is what actually works, roughly in order of cost and effort.
Step 1: Seal the Gaps and Cracks (Cheapest, Do This First)
Sound leaks through air the way water leaks through a pipe. A 1% gap in a ceiling can cut its sound-blocking ability dramatically. Before spending a dollar on insulation or drywall, seal everything.
What to seal:
- Gaps around recessed can lights (this is the biggest offender in finished basements)
- Plumbing and duct penetrations through the subfloor
- Cracks along the edges where the ceiling meets the walls
- Holes from old wiring or abandoned pipes
Use acoustic sealant (often called acoustic caulk) rather than regular caulk. Acoustic sealant stays flexible for decades, and drywall moving and settling will not crack it open. Regular latex caulk hardens and cracks; silicone caulk can interfere with paint and some finishes.
Cost: roughly $10–15 per tube, and one tube covers about 50–80 linear feet of bead. For a typical basement, $30–60 total.
Effort: a weekend afternoon. This is the highest-value step in this guide relative to its cost.
Step 2: Add Insulation Between the Joists
Once the gaps are sealed, fill the joist cavities. Insulation does two things: it absorbs sound bouncing around inside the empty cavity, and it slows the vibration transfer through the air in the cavity.
Mineral Wool vs. Fiberglass: Which Is Better for Sound?
Both beat an empty cavity, but mineral wool is better for soundproofing. Products like Rockwool Safe’n’Sound are denser than standard fiberglass batts, and density is what matters for blocking sound. Mineral wool is also fire-resistant and does not sag over time the way fiberglass can.
Fiberglass is cheaper and fine if budget is tight — it still makes a real difference over nothing. But if you are opening the ceiling anyway, mineral wool is the one to buy.
Fit the batts snugly between the joists but do not compress them. Compressed insulation loses effectiveness, and you need the cavity depth anyway.
Cost: about $1–3 per square foot for mineral wool batts, less for fiberglass.
Effort: a weekend for a DIYer with a utility knife, gloves, and a dust mask. Work from a stable platform, not a wobbly ladder.
Step 3: Decouple with Resilient Channel (Hat Channel)
This is where results get serious. Resilient channel — also called hat channel because of its cross-section shape — is a thin metal strip that screws to the joists. You then screw the drywall to the channel, not to the joists.
Why this matters: sound from footsteps vibrates the joists. If the drywall is screwed directly to the joists, that vibration transfers straight into the drywall and radiates into your basement. Resilient channel breaks that hard connection. The drywall hangs on flexible metal, so far less vibration gets through.
Key installation details:
- Mount the channels perpendicular to the joists, 24 inches on center.
- Use only one screw per joist crossing, centered in the channel’s slot — the flange of the channel should float.
- Never let a screw go through the drywall and into a joist. One “short circuit” screw per joist barely matters, but a habit of it defeats the whole system.
- Do not use resilient channel as a substitute for fixing gaps — do step 1 first.
Cost: roughly $4–7 per square foot installed as a DIY project (channel plus drywall).
Effort: moderate. It is straightforward screwing, but the ceiling is heavy overhead work. A drywall lift rental (about $50–75/day) is worth it.
Step 4: Add Mass with Mass Loaded Vinyl (MLV)
Mass loaded vinyl is a heavy, thin, flexible sheet — usually 1 lb per square foot — designed to add mass without adding much thickness. You staple or screw it to the underside of the subfloor or to the first drywall layer, then cover it with drywall.
The rule of soundproofing: mass blocks sound. MLV adds a lot of mass in about 1/8 inch of thickness, which makes it useful when you cannot afford to lose ceiling height — a real concern in basements with 7- or 8-foot ceilings.
Practical notes:
- Overlap seams by 2 inches and tape them with acoustic tape.
- MLV is heavy — a 4×25-foot roll can weigh 100 lbs. Get a helper.
- It works best combined with decoupling (step 3) or damping (step 5). On its own, screwed to joists, it underperforms.
Cost: roughly $1.50–2.50 per square foot for the material alone.
Effort: moderate. Cutting and hanging heavy rolls overhead is awkward but doable with two people.
Step 5: Damp Vibration with Green Glue
Green Glue is a viscoelastic damping compound. You apply it in a random bead pattern between two layers of drywall, and it converts sound vibration into tiny amounts of heat. It is not glue in the structural sense — the screws still hold the drywall — and it is not caulk. It stays permanently flexible.
This is one of the most effective single upgrades you can make to a basement ceiling, especially for impact noise (footsteps). Damping kills the resonance of the drywall itself.
How to apply it:
- Use two tubes per 4×8 sheet of drywall (do not skimp — the dosage matters).
- Apply in a random pattern, not a neat grid. Random beads work better.
- Hang the second layer of drywall within 15 minutes of applying, then screw it through to the channel or joists.
- Green Glue needs about 30 days to fully cure. You will hear improvement immediately, and it gets better over the first month.
Cost: as part of a double-drywall assembly, roughly $8–15 per square foot total.
Effort: moderate. If you can hang drywall, you can do this — the Green Glue step adds maybe 10 minutes per sheet.
Step 6: Double Drywall (Best Paired with Green Glue)
Two layers of 5/8-inch drywall have roughly twice the mass of one layer, and mass blocks sound. But plain double drywall screwed to joists is only a modest improvement — the real gains come from combining double drywall with Green Glue between the layers and resilient channel behind them.
The full high-performance basement ceiling stack, from top to bottom:
- Subfloor above
- Mineral wool insulation between joists
- Resilient channel
- First layer of 5/8″ drywall
- Green Glue
- Second layer of 5/8″ drywall
- Acoustic sealant at all edges
This assembly handles both airborne and impact noise well. It costs more and eats about 1.5–2 inches of ceiling height, but it is the closest thing to a done-right residential solution short of a fully floated ceiling.
Cost: $8–15 per square foot DIY, depending on whether you include resilient channel and Green Glue.
Effort: significant. Double drywall is heavy. Rent a drywall lift, get a helper, and plan a full weekend (or two) for an average basement.
Step 7: Consider a Drop Ceiling (Acoustic Tile)
A drop ceiling (suspended acoustic tile grid) is the easiest option if you need to keep access to plumbing, wiring, and shutoff valves above — which many basements do. But be honest about its limits: a standard drop ceiling with basic tiles is a weak sound barrier. It is better than nothing and much better than exposed joists, but it will not match drywall assemblies.
To get real performance from a drop ceiling:
- Use high-NRC and high-CAC tiles. NRC measures absorption (echo), CAC measures blocking (what you want). Standard tiles have low CAC. Look for tiles rated CAC 35+.
- Add mineral wool batts above the tiles, resting on the grid.
- Seal the perimeter of the grid with acoustic sealant.
Cost: roughly $2–5 per square foot for grid and decent tiles.
Effort: easy to moderate. Hanging a level grid is fussy but well documented, and no drywall finishing is required.
The honest tradeoff: a drop ceiling is the access-friendly, renter-friendly, budget-friendly choice — but it is the weakest option here for actual sound blocking. Choose it when you need the access, not when you need maximum quiet.
Which Method Should You Choose?
Match the method to your noise problem and budget.
“I hear footsteps and thumping from above” (impact noise)
Impact noise is the hardest to fix and needs decoupling or damping:
- Best value: resilient channel + double drywall with Green Glue ($8–15/sq ft)
- Budget option: mineral wool between joists + a single layer of drywall on resilient channel ($4–7/sq ft)
- Skip: acoustic foam, MLV alone, or insulation by itself — none of these adequately address vibration traveling through the joists
“I hear voices, TV, and music” (airborne noise)
Airborne noise responds well to mass and sealing:
- Best value: seal gaps + mineral wool + double drywall with Green Glue ($8–15/sq ft)
- Budget option: seal gaps + mineral wool + MLV under one layer of drywall ($3–6/sq ft)
- Skip: foam panels and blankets — they treat echo in the room, not sound coming through the ceiling
“I need access to pipes and wiring above”
- Drop ceiling with high-CAC tiles + mineral wool above the grid ($2–5/sq ft). Accept that it will be quieter, not silent.
“I want the cheapest thing that actually helps”
- Seal the gaps ($30–60 total) + mineral wool between joists ($1–3/sq ft). This is the best dollars-to-results ratio in the guide. Do this before anything else, no matter what your final plan is.
Quick Cost Summary
| Method | Rough DIY cost per sq ft | Best for |
|---|---|---|
| Seal gaps with acoustic caulk | $30–60 total | Every project — do first |
| Mineral wool between joists | $1–3 | Every project — do second |
| Drop ceiling (good tiles) | $2–5 | Access to utilities |
| Resilient channel + drywall | $4–7 | Footsteps on a budget |
| MLV + drywall | $3–6 | Low ceiling height |
| Double drywall + Green Glue | $8–15 | Maximum quiet |
For a 400 sq ft basement ceiling, that means roughly: $400–1,200 for insulation alone, $1,600–2,800 for a resilient channel assembly, and $3,200–6,000 for the full Green Glue double-drywall build.
FAQ
-
How much does it cost to soundproof a basement ceiling?
For a DIY project, expect $1–3 per square foot for insulation alone, $4–7 for a resilient channel assembly, and $8–15 for double drywall with Green Glue. A 400 sq ft ceiling runs roughly $400 on the budget end to $6,000 for a full high-performance build. Sealing gaps with acoustic caulk costs $30–60 and should be done regardless of budget.
-
Does insulation alone soundproof a basement ceiling?
It helps, but it is not enough by itself. Insulation absorbs sound inside the joist cavities and noticeably reduces airborne noise like voices. It does little for impact noise like footsteps, because vibration still travels through the joists. Pair insulation with resilient channel or Green Glue for real results.
-
Is Rockwool better than fiberglass for soundproofing?
Yes. Mineral wool (such as Rockwool Safe’n’Sound) is denser than standard fiberglass batts, and density is what blocks sound. It is also fire-resistant and holds its shape over time. Fiberglass is cheaper and still a real improvement over an empty cavity, but mineral wool is the better buy when the ceiling is open.
-
Will acoustic foam panels soundproof my basement ceiling?
No. Acoustic foam absorbs echo inside a room — it does not block sound traveling through the ceiling. Foam panels will make your basement sound slightly less echoey but will not reduce footsteps or voices from above in any meaningful way.
-
What is the best soundproofing for footsteps from upstairs?
Decoupling plus damping: resilient channel with double drywall and Green Glue between the layers. Footsteps are impact noise — vibration traveling through the joists — so you need to break the vibration path (resilient channel) and damp the drywall’s resonance (Green Glue). Insulation alone will disappoint you here.
-
Can I soundproof a basement ceiling without losing headroom?
Mostly. MLV adds serious mass in about 1/8 inch. Resilient channel plus one layer of drywall adds about 1.5 inches. The full double-drywall Green Glue assembly costs you roughly 2 inches. If your ceiling is already at 7 feet, plan around every inch and consider MLV to keep the profile thin.
-
How long does Green Glue take to work?
You will notice improvement immediately, but Green Glue takes about 30 days to fully cure. Performance keeps improving over that first month as the compound reaches its final viscoelastic state.
-
Should I use a drop ceiling or drywall for basement soundproofing?
Drywall — especially double drywall on resilient channel — blocks significantly more sound than a standard drop ceiling. Choose a drop ceiling only when you need regular access to plumbing, wiring, or shutoff valves above, and use high-CAC tiles (rated 35+) with mineral wool above the grid to get the most out of it.