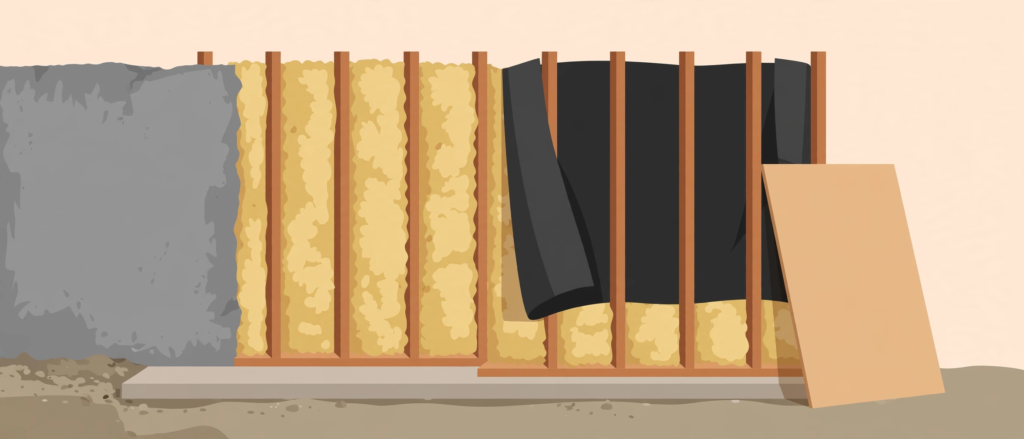
Basement walls are some of the hardest surfaces in a home to soundproof, and most failures come from doing the right steps in the wrong order. This guide covers the correct sequence: control moisture, seal air gaps, frame, insulate, add mass, hang drywall, and finish. Follow the order and you get a wall that actually blocks sound. Skip a step and you get a wall that looks finished but performs like bare concrete.
Why Basement Walls Need a Different Approach
Bare concrete or block walls (below grade). Heavy, so they already block some airborne sound by mass alone. Weak points are air leaks: gaps around rim joists, pipe penetrations, electrical conduit, and the sill plate. Concrete also transmits vibration efficiently, so footfall and mechanical equipment travel through the structure.
Framed walls over concrete (or interior basement partitions). Once studs go up, you have a cavity to work with — which is where real soundproofing happens. But a standard stud wall with batt insulation and one layer of drywall is a poor barrier: studs bridge vibration straight through, and a single layer of half-inch drywall adds far less mass than most people expect.
The sequence below works for both wall types; divergences are called out per step.
The Four Principles of Soundproofing
Every step in this guide serves one of four principles:
- Add mass. Heavy materials block sound. Two layers of drywall outperform one; mass-loaded vinyl (MLV) adds mass without much thickness.
- Decouple. Break the rigid path vibration travels through — staggered studs, resilient channel, isolation clips.
- Absorb. Porous insulation in the cavity converts sound energy to heat and kills resonance between the wall faces.
- Damp and seal. Seal every air gap, because sound travels through air. Damping compounds between drywall layers cut vibration.
If a step does not serve one of these four, it does not belong in a soundproofing project. Paint does nothing for sound; acoustic foam treats echo inside a room, not transmission through a wall.
Step 0: Deal With Moisture First
This step comes before everything else because it determines whether the rest of the project is safe to build.
Never trap moisture behind a vapor-impermeable layer — such as mass-loaded vinyl, polyethylene sheeting, or foil-faced insulation — on a below-grade concrete wall without first addressing water intrusion. Concrete below grade wicks moisture from surrounding soil continuously. A vapor-impermeable layer on the interior face stops that moisture from drying inward, and the trapped water becomes a mold colony behind your finished wall. You will not see it at first, and by the time you do, the wall assembly has to be torn out.
Before framing or hanging anything:
- Fix bulk water first. Active seepage, puddles after rain, or efflorescence (white mineral crust) mean an exterior drainage problem: grade soil away from the foundation, extend downspouts, and in persistent cases add an interior French drain or sump. No interior wall assembly fixes water coming through the wall.
- Test for chronic dampness. Tape a 2-foot square of clear plastic to the concrete, seal all edges, and leave it 48 to 72 hours. Moisture on the room side means indoor humidity (a dehumidifier handles it). Moisture on the concrete side means vapor migrating from the soil — that wall cannot receive a vapor-impermeable soundproofing layer until the migration is controlled.
- Use vapor-open materials. Below grade, unfaced mineral wool or fiberglass beats faced or foil-faced insulation. If the wall must dry inward, the assembly needs to let it.
- Run a dehumidifier. Finished basements should hold 30 to 50 percent relative humidity.
A soundproof wall built over a wet foundation is a demolition project waiting to happen — do not proceed until moisture is under control.
Step 1: Seal Every Air Gap
Sound behaves like water: it finds the smallest opening and pours through. A single unsealed electrical box can undo the benefit of an entire layer of drywall. Seal before insulation and drywall go up — these gaps become unreachable afterward.
- Rim joists. The cavity where floor framing sits on the foundation wall is one of the biggest sound and air leaks in a basement. Cut mineral wool or foam board to fit each bay, then seal the perimeter with acoustic sealant or expanding foam.
- Sill plate. Bead of acoustic sealant along the joint where the sill plate meets the top of the concrete wall.
- Penetrations. Seal around the full circumference of every pipe, wire, and duct with acoustic sealant (fire-rated caulk where code requires).
- Future electrical boxes. Every box is a hole in the finished wall. Plan placement now to minimize the count, and budget putty pads (moldable acoustic pads wrapping the back of each box) for rough-in — not after drywall.
Use acoustic sealant (it stays flexible) rather than standard latex caulk for joints that may move. Expanding foam is fine for large irregular gaps; trim it flush where it will sit behind drywall.
Step 2: Frame the Wall (If Starting From Bare Concrete)
If your basement walls are bare concrete, you need a framed wall to hold insulation and drywall. Two details matter for sound:
- Leave an air gap. Keep at least 1 inch between the back of the studs and the concrete. Studs touching concrete create a rigid vibration bridge from the foundation into the finished wall. Use pressure-treated bottom plates where wood meets concrete (code requirement).
- Consider staggered studs. On a 2×6 plate, alternate studs so each wall face attaches to a different set — one of the most cost-effective decoupling upgrades available.
For a home theater wall, staggered wood studs are the practical pick. If the wall is already framed and drywalled, skip ahead — but verify moisture control and sealing were handled first.
Step 3: Fill the Cavity With Insulation
Insulation in a soundproof wall is not there to block sound by itself. Its job is to absorb sound energy inside the cavity so the space between the two wall faces does not act like a drum. An empty cavity resonates; a filled one does not.
- Mineral wool batts (stone wool) are the best common choice: denser than standard fiberglass, hold their shape without sagging, naturally fire-resistant, and vapor-permeable — which matters below grade. Friction-fit them between studs so they fill the cavity fully without compression.
- Unfaced fiberglass batts are the budget option and perform reasonably. Use unfaced, not kraft-faced, below grade to keep the assembly vapor-open.
- Blown-in cellulose works for existing closed walls (dense-packed through small holes).
Fill every bay completely. Do not use spray foam as the primary cavity fill — its rigidity can couple the wall faces together, working against decoupling.
Step 4: Add Mass — MLV or a Second Layer of Drywall
This is the step most DIY guides underweight. Insulation absorbs sound inside the wall, but only mass blocks it from passing through. A standard single layer of half-inch drywall adds roughly 2.2 pounds per square foot — doubling it roughly doubles the sound-blocking mass, and the real-world improvement for voices, TV, and music is dramatic.
Option A: Mass-loaded vinyl (MLV). A dense, flexible sheet — typically 1 pound per square foot at 1/8 inch thick. It adds significant mass without stealing room depth. Hang it over the studs before drywall, overlap seams by 2 inches, and seal overlaps with acoustic tape or sealant. Cutouts for electrical boxes must be tight and sealed. [AFFILIATE: mass-loaded-vinyl-roll]
The MLV moisture rule, restated: MLV is vapor-impermeable. On a below-grade concrete wall it goes on the room side of a vapor-open cavity, and only after Step 0 confirmed the wall is dry. If the plastic-sheet test showed vapor migrating through the concrete, do not install MLV against that wall until the moisture source is fixed — use the double-drywall approach with vapor-open insulation instead.
Option B: Double drywall with damping compound. Hang a first layer of 5/8-inch drywall, apply a viscoelastic damping compound (it stays flexible between the sheets and converts vibration to heat), then hang a second 5/8-inch layer with staggered seams. The damping compound is the key — two layers glued rigidly together perform noticeably worse than two layers with damping compound between them.
Which to choose? For maximum performance in minimum thickness: MLV plus one layer of 5/8-inch drywall. For maximum mass on a budget: double 5/8-inch drywall with damping compound — it also sidesteps the vapor-impermeability concern entirely. For a dedicated home theater, do both.
Stagger all drywall seams between layers so none line up, and seal the perimeter of the finished wall — top, bottom, corners — with acoustic sealant.
Step 5: Hang Drywall With Decoupling in Mind
How drywall attaches to framing matters as much as how much drywall there is. Screwing drywall directly to studs creates a rigid vibration bridge. Three better approaches, in order of effectiveness:
- Resilient channel. Metal channels mounted perpendicular to the studs; drywall screws only to the channel, which flexes and absorbs vibration. Best value decoupling upgrade — but screws that miss the channel and hit a stud (“short-circuiting”) defeat the purpose.
- Isolation clips with hat channel. Rubber-isolated clips on the studs hold a metal channel; drywall mounts to the channel. Pricier, measurably better, and far more forgiving of installation errors.
- Staggered-stud framing. Each wall face attaches to its own stud set, so vibration has no direct path through (see Step 2).
Use 5/8-inch Type X drywall over half-inch: heavier, more fire-resistant, and code-required in some basement applications. Keep drywall 1/2 inch off the concrete floor and seal that bottom gap with acoustic sealant before baseboard goes on.
Step 6: Finish Without Undoing the Work
Finishing is where soundproofing projects quietly fail. Every penetration through the finished drywall is a new sound leak.
- Electrical boxes: use the putty pads installed during rough-in.
- Recessed lights: avoid them entirely in a soundproofed basement. Each can light is a large hole — use surface-mounted fixtures instead.
- Doors: a soundproofed wall with a hollow-core door is a contradiction. Install a solid-core door with full-perimeter weatherstripping and a threshold seal. The door is almost always the weakest element of the finished room — budget for it.
- Trim and baseboard: seal behind trim with acoustic sealant before nailing it up. Baseboard over an unsealed bottom gap looks fine and leaks sound.
Concrete vs. Framed Walls: Quick Reference
- Moisture check: mandatory for both — pull a section of existing drywall if unsure.
- Framing: bare concrete needs a new wall with a 1-inch gap off the concrete; existing framing can stay unless you are rebuilding for staggered studs.
- Insulation: mineral wool in new cavities (unfaced); dense-pack if the wall is already closed.
- Mass: MLV on studs only if the wall is dry; otherwise a second drywall layer with damping compound over existing drywall.
- Drywall: 5/8-inch Type X, resilient channel preferred on new work.
- Biggest risk: trapping moisture behind MLV (concrete walls) or skipping the seal step because the wall “looks done” (framed walls).
What This Costs (Rough DIY Budget)
For a 12×12-foot basement room with 8-foot walls (about 384 square feet of wall), DIY materials run roughly $1,500 to $3,600 total:
- Framing lumber and fasteners: $300–$500
- Mineral wool batts: $400–$700
- MLV: $600–$1,000, or damping compound + second drywall layer: $400–$700
- 5/8-inch drywall: $300–$450
- Resilient channel: $150–$250
- Acoustic sealant, putty pads, tape: $100–$200
- Solid-core door with seals: $250–$500
Professional installation typically doubles or triples the DIY total. The sealing materials are the cheapest line item and the highest return — do not economize there.
Common Mistakes to Avoid
- Insulation only, no mass. A wall full of mineral wool with one layer of drywall absorbs sound inside the cavity but barely blocks transmission. Mass is non-negotiable.
- Foam panels on the wall. Wedge-shaped acoustic foam treats echo inside a room. It does almost nothing to stop sound passing through a wall.
- MLV on a damp wall. The mold mistake — covered in Step 0.
- Sealing after drywall. Once the wall is closed, rim joist and top plate gaps are unreachable. Seal first.
- Forgetting the ceiling and door. Sound flanks around a perfect wall through an unsealed ceiling or hollow door. Treat the room as a system.
For a budget-friendly approach to the ceiling, see our guide to the cheapest ways to soundproof a basement ceiling.
Frequently Asked Questions
Can I soundproof basement walls without framing?
Yes — adhere MLV directly to dry concrete and cover it with drywall on furring strips. But you lose the cavity insulation benefit and decoupling is minimal: better than bare concrete, well short of a framed, insulated, decoupled wall. The moisture rule still applies first.
How much does it cost to soundproof a basement wall?
DIY materials run roughly $4 to $9 per square foot. A single 12-foot wall is typically $500 to $1,100 in materials. Professional installation usually lands between $10 and $25 per square foot.
Is mass-loaded vinyl worth it for basement walls?
MLV earns its place when room depth is limited: a full pound per square foot of mass at 1/8 inch thick. Double drywall with damping compound matches or beats it for less money when you can spare the thickness. Skip MLV on any wall that has not passed a moisture check.
Will insulation alone soundproof my basement walls?
No. Insulation absorbs sound inside the cavity and prevents resonance, but it does not block transmission. A wall needs mass to block sound, decoupling to stop vibration, and sealing to close air paths. Insulation is one of four required elements, not a standalone solution.
Can I soundproof just one basement wall?
You can, and it helps when that wall is the dominant transmission path — say, between a home theater and a bedroom. But sound flanks around it through the ceiling, floor, and adjacent walls, so expect a modest improvement. For a theater or music room, treat all four walls and the ceiling as a system.
What is the best drywall for soundproofing basement walls?
Standard 5/8-inch Type X: heavier than half-inch, widely available, affordable. Specialty soundproof drywall performs slightly better per layer but costs several times more — two layers of standard 5/8-inch with damping compound between them is the better value.
Do I need a vapor barrier when soundproofing basement walls?
Below grade, usually no — an interior vapor barrier can trap moisture and cause mold. Keep below-grade assemblies vapor-open: unfaced insulation, no poly sheeting. Above-grade walls follow normal vapor-barrier rules for your climate zone. The plastic-sheet test in Step 0 tells you which situation you have.
How long does it take to soundproof basement walls?
A DIYer working weekends can finish a single 12-foot wall in two to three weekends. A full 12×12 room typically takes four to six weekends. Damping compound needs 7 to 10 days to cure fully — judge the results after the cure period, not the day the drywall goes up.